RZR MODS
Initial Modifications to the Polaris RZR
In the last post I mentioned we upgraded the rzr with a couple of new modifications. Those were in windshield and a custom GPS/phone mount.
The windshield
The windshield came from everythingpolarisrzr. They have a large selection of windshields available for most of the Polaris lineup. I chose this particular one because it was glass, had an optional wiper available, included an easy to open vent, and the price was very competitive for a full glass windshield. As far as installation goes it was very straightforward and was installed within 15 minutes. The downside was there were no included instructions for the wiper install and the wiper ended up breaking as I was trying to figure it out. Looking at it now, I probably should have contacted the company to get the instructions. Other than the wiper debacle I've been very impressed with the windshield so far. We've only put one trip on it, but it is a huge improvement over the old plaatic windshield. We rode in very wet muddy conditions and you just simply put a little water on the window and wipe off the mud! I would definitely not try that with the plastic windows. 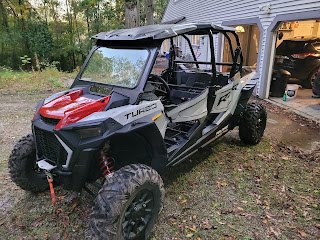
GPS/Phone mount
The next upgrade I wanted to do was a gps/phone mount. I debated just getting one that attaches to the roll cage but I wasn't convinced I'd be able to put it somewhere with good line of site without being completely in the way. So I went about researching what others had done. I found the top storage compartment was fairly simple to remove and could even get replacement sections that included built in gps/phone mounts. However the cheapest of those I could find was over $50!! So I went out to the garage to see what I could fabricate myself instead! Below is what I came up with.


Next I used some cardboard to figure out the shape I would need to cut for my mount. Once I had the cardboard cut, I mocked it up in position to ensure it would fit correctly.

Once I had the cardboard fitting exactly how i wanted it to, it was time to outline the overall shape on the sheet metal. The metal was just some thin gauge scrap I had laying around. I used a cutoff wheel to follow the tracing from the carboard.

Once I was satisfied with the overall shape I needed to drill the holes for mounting it to the dash. I marked where the original clips held the storage box in and also marked where the bottom section latched into place. I purchased addition push pins off Amazon so I could fasten the bottom in the same fashion as the top. This allows the entire mount to be easily removable and can go back to stock anytime I want to.
One of the final steps of the fabrication was to drill the holes for the ram mount base I had purchased. I went this route because I can install any combination of the ram mount components in the future if I decide to go with a tablet instead of using my phone as the GPS.

Once all the holes I needed were drilled I was able to spray paint it with bed liner. I thought going with bedliner would hide some of the imperfections in the metal rather than a plain coat of paint. In the end it kind of globbed in a couple spots but overall for just a couple hours of time spent I was happy with the results.


Conclusion
These two projects were the first of many I'm sure. I keep saying I won't add anything else, but there's always something that can be improved upon! Stay tuned to the blog and check out our Instagram and Facebook pages as well for more frequent updates! If you have any questions on what components I used or how I did something here feel free to leave a comment or reach on via the contact page. Everyone have a great weekend and hopefully spend some time outdoors!


Comments
Post a Comment